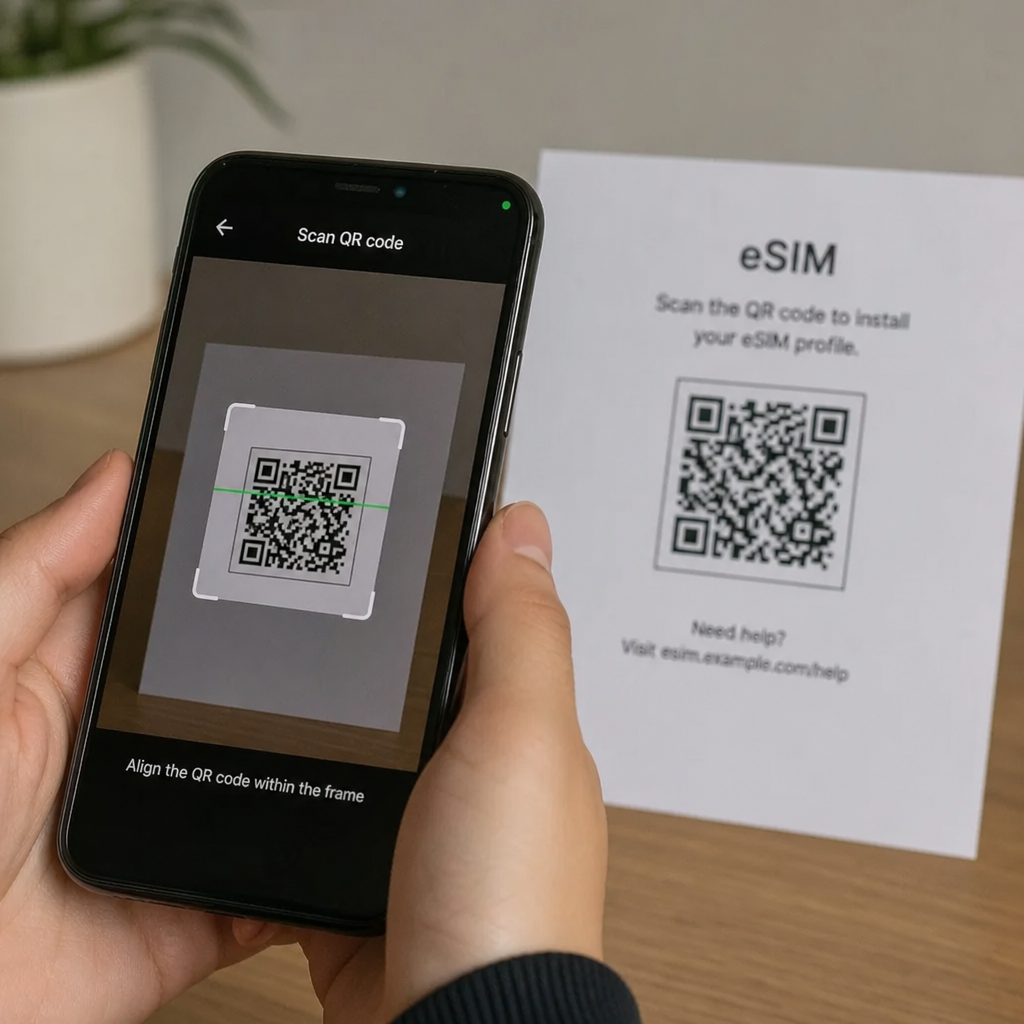
An eSIM lets many Android users connect to a mobile network without inserting a physical SIM card. Instead of swapping plastic cards, you download a digital profile from a carrier or travel provider, complete esim activation, and manage your line from your phone settings. This guide explains how esim android setup works, what to check before buying a plan, and how to switch or move service with fewer surprises.
What is an eSIM on Android?
An eSIM on Android is a built-in digital SIM that stores your mobile network profile inside the device. It can do many of the same things as a physical SIM, including supporting calls, texts, and mobile data, depending on your carrier and plan. The main difference is convenience: instead of waiting for a SIM card or visiting a shop, you can often activate a plan by scanning a QR code, using a carrier app, or entering activation details manually.
For frequent travelers, remote workers, and people who use separate personal and business numbers, eSIM can make mobile service easier to manage. Many Android devices also allow one physical SIM and one eSIM, or multiple stored eSIM profiles with one or two active at a time. The exact behavior depends on the phone model, Android version, and carrier support.
Why eSIM matters for Android users
The biggest benefit of eSIM is flexibility. You can add a data plan before a trip, switch between providers without handling a tiny SIM tray, or keep your main number active while using a local or travel data plan. This is especially useful in situations where mobile data matters immediately, such as landing in a new country, setting up a work phone, or replacing a lost SIM.
A typical esim android use case might look like this: you keep your primary carrier for calls and texts, then add a short-term travel data plan for another country. When you arrive, you select the travel eSIM for mobile data while keeping your main line available for important messages. That reduces roaming stress and gives you more control over how you use data.
Common advantages include:
Faster setup: Many plans can be activated digitally without a store visit.
Less physical clutter: No need to carry multiple SIM cards or ejector tools.
Travel convenience: You can compare esim plans before leaving home.
Dual-line flexibility: Some phones support work and personal lines on one device.
Easier plan testing: You may be able to try a new provider without giving up your current SIM.
How does esim activation work?
Esim activation works by downloading a carrier profile to your Android phone and linking it to a mobile plan. In most cases, the provider gives you a QR code, app-based setup flow, or manual activation code. Once the profile is installed, you choose whether the eSIM handles calls, texts, mobile data, or a combination of those services.
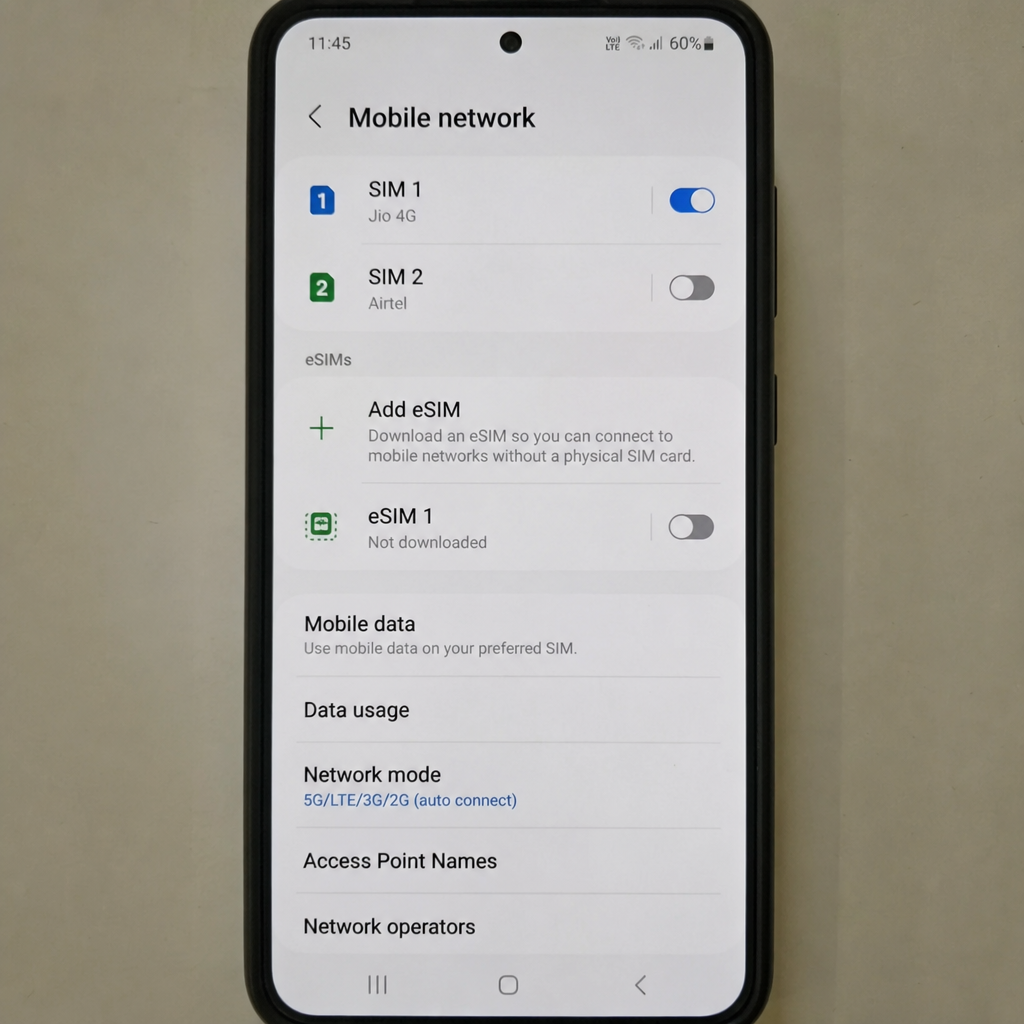
Although each Android brand labels settings slightly differently, the process usually follows the same pattern. You first confirm that the device is unlocked or supported by the provider. Then you connect to Wi-Fi, open your SIM or mobile network settings, add an eSIM, and follow the provider’s instructions. After activation, the phone may take a few minutes to register on the network.
A simple setup checklist:
Check esim compatibility for your exact Android model, not just the brand.
Confirm carrier support in the country where you plan to use the service.
Connect to Wi-Fi before starting, because the phone needs internet access to download the eSIM profile.
Scan the QR code or use the provider app exactly as instructed.
Label the plan clearly, such as “Main,” “Work,” “Travel,” or “Sri Lanka Data.”
Set default lines for calls, texts, and mobile data.
Test the connection by turning off Wi-Fi and loading a webpage or sending a message.
If activation fails, avoid deleting the eSIM immediately unless the provider tells you to. Some eSIM profiles can only be downloaded once, and deleting them may require a replacement code.
Understanding eSIM compatibility before you buy
Esim compatibility is the first thing to verify because not every Android phone supports eSIM, and not every eSIM-capable phone works with every carrier. A flagship device in one market may include eSIM support, while a similar model sold in another region may not. Carrier locks, software versions, and regional variants can also affect whether the option appears in settings.
To check compatibility, start with the phone itself. On many Android devices, you can open mobile network settings and look for an option such as “Add eSIM,” “Download a SIM,” or “Add mobile plan.” You can also check the device specifications from the manufacturer and compare them with the provider’s supported-device list.
Before purchasing esim plans, confirm these points:
Your Android phone supports eSIM hardware.
The phone is not locked to a carrier that blocks the plan you want.
The provider supports your phone model and country.
The plan includes the services you need, such as data only or calls and texts.
You understand whether the eSIM can be reinstalled if you reset or replace the phone.
This last point is easy to miss. Some travel eSIMs are designed for one-time installation, while some carrier eSIMs can be transferred or reissued through an account portal, store, or support team.
Choosing eSIM plans for everyday use and travel
The right plan depends on how you use your phone. A local carrier eSIM may be best if you need a long-term number, strong domestic coverage, and full support for calls and texts. A travel eSIM may be better if you mainly need data for maps, messaging apps, rideshare services, email, and browsing while abroad.
When comparing esim plans, look beyond the headline data amount. Check the coverage area, plan duration, hotspot rules, speed limitations, refund policy, and whether top-ups are available. A cheaper plan is not always better if it expires too quickly, cannot be topped up, or only works on networks with limited coverage in the places you will visit.
For travel, think through your actual usage:
Light use: Messaging, maps, email, and occasional browsing.
Moderate use: Social media, video calls, file sharing, and frequent navigation.
Heavy use: Streaming, hotspot use, large uploads, or working from mobile data.
Some people search for a free esim service for android, especially when testing eSIM for the first time. Free trials or promotional data offers may exist from some providers, but they are usually limited by location, data amount, duration, or eligibility. Treat “free” as something to read carefully, not as a guarantee of full mobile service.
Changing providers on Android for Sri Lanka and other destinations
If you are traveling or relocating, changing an eSIM provider can be straightforward, but you should avoid deleting your current service too early. For example, someone searching “android phone how to change esim provider for sri lanka” is usually trying to replace or add a plan that works locally in Sri Lanka. The safest approach is to install the new eSIM while you still have Wi-Fi, confirm the plan is ready, and only then switch your mobile data line.
In your Android settings, you can usually keep more than one eSIM profile stored, though only a limited number may be active at the same time. This means you may be able to turn off your old travel plan and turn on a new one without physically changing anything. If your phone does not allow multiple active lines, you may need to disable one SIM before enabling another.
Practical steps for changing providers:
Buy or request the new eSIM from a provider that supports your destination and device.
Install the eSIM over Wi-Fi before you need mobile data.
Give the plan a clear label, such as “Sri Lanka eSIM.”
Set the new eSIM as the mobile data line.
Keep your primary number active if you still need calls, texts, or verification codes.
Test data access after arrival or once the provider says service is live.
Remove old travel eSIM profiles only when you are sure they are no longer needed.
If you use banking apps or services that rely on SMS verification, be careful when switching. Keep access to the number that receives security codes until you have updated your account settings.
Can you transfer esim to new phone android?
You can sometimes transfer esim to new phone android, but the process depends on the carrier, phone model, and whether the eSIM profile is eligible for transfer. Some providers allow an in-device transfer, some require a new QR code, and others ask you to contact support or visit a store. Travel eSIMs may be more restrictive, especially if the plan was intended for one device only.
Before you erase or trade in your old phone, check the provider’s instructions. If your eSIM is tied to your main phone number, losing access during the move can interrupt calls, texts, and account verification. Ideally, complete the transfer while both phones are charged, connected to Wi-Fi, and available at the same time.
A safer transfer process looks like this:
Back up your old Android phone.
Confirm your new phone supports eSIM.
Check whether your provider supports eSIM transfer or reactivation.
Keep your old phone active until the new phone connects successfully.
Test calls, texts, and mobile data on the new device.
Remove the eSIM from the old phone only after the new setup works.
If your provider issues a replacement eSIM, treat the new QR code or activation details like sensitive account information. Do not share it publicly or store it somewhere insecure.
Common eSIM mistakes to avoid
Most eSIM problems come from rushing the setup or assuming every provider follows the same rules. A few minutes of checking can prevent a long support chat later. This is especially true when traveling, because solving activation issues is harder when you are already away from reliable Wi-Fi.
Avoid these common mistakes:
Buying a plan before checking esim compatibility.
Starting activation without Wi-Fi.
Deleting an eSIM profile before confirming it can be reinstalled.
Assuming a data-only eSIM includes a phone number.
Forgetting to set the correct SIM for mobile data.
Leaving data roaming off when the provider requires it for service.
Ignoring plan expiration dates or fair-use limits.
It also helps to name each line clearly. Labels like “SIM 1” and “SIM 2” become confusing when you are tired, traveling, or troubleshooting. Clear labels reduce the chance of using the wrong line for data and accidentally creating extra costs on your primary plan.
The practical takeaway
E-SIM technology makes Android phones more flexible, especially for travelers, dual-line users, and anyone who wants to compare providers without swapping physical cards. The key is preparation: confirm compatibility, understand the activation process, choose the right plan, and know the provider’s rules before deleting or transferring anything.
If you are new to eSIM, start with a low-risk setup, such as adding a short-term data plan while keeping your physical SIM active. Once you understand how your Android phone manages lines, switching providers, using travel data, and moving service to a new device becomes much easier.